How to Make GPT, 4K Sector Drives and 3TB Drives Work as Storage Pool Drives in WHS PP3
 I recently had an idea for a workaround for 4k sector drives in WHS V1. I kept working on the idea. I am happy to announce that I have been able to come up with a method that should work for anyone using WHS PP3 to do the following things:
- Create and Realign 4k Sector Drives correctly
- Utilize GPT Partitions in the Storage Pool
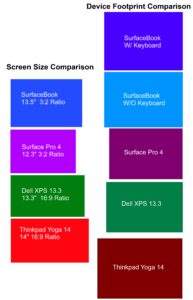
- Fully Utilize Disks larger than 2.1TB (3TB HDD in WHS anyone?)
In my own testing I have been able to create two 4TB GPT Partitions as storage pool drives. I have added and removed drives with no problem using this guide.
This is obviously not something recommended by microsoft, but there are many people out there who want to use 4k sector drives and align them properly without the use of jumpers, use 3TB hdd in WHS, use raid arrays in WHS larger than 2.1TB. This guide should let you do just that… Just a disclaimer, you do this at your own risk and I will not be held liable for you losing data. This is a fairly complicated guide, so do this at your own risk.
Here is the Guide:
1) Create storage space in raid controller/ install 3tb/advanced format drive
2) Turn on whs (make sure that nobody is copy files to or from the server before you proceed.)
3) If you have other drives added; make note of existing mount points in C:\fs folder. (i.e c:\fs\1k) That way you will know which mount point is the new one that is added.
4) Use whs to add disk to storage pool normally. (at this point, it will be added with a maximum capacity of 2.1tb, MBR only, and not aligned correctly for 4k sector drives.)
5) Make note of where the disk is mounted in c:\fs (for example mine created C:\fs\1K)
6) We need to make note of the original DISK ID at this step. This will make your life much easier later!
Use the command prompt and type “diskpart”
Type “List Disk” to see all your disks
Choose the disk you would like to view by typing Select Disk X (i.e Select Disk 1)
Type “Detail Disk”
Look for the Disk ID: (for example mine was DISK ID: DB7CA365)
Write down this diskid so you have it later.
7) Enter services by going to Windows – Run – Type “services.msc” Stop the services “Drive Extender Migrator Service” and “Virtual Disk Service” (you will get a prompt here that this will also shut down additional services.. Thats fine.) It is important to stop these services almost immediately after adding the disk in step 4, we don’t want any data copied to this drive if we can help it during this critical point.
8) Make a Copy of all files out of c:\fs\mount point that corresponds to your disk except the System Volume Information folder (you might need to change your windows explorer view settings to include view hidden files/system files/ protected operating system files)
9) OK here we go, time to delete the crappy partition that WHS created in step 4. Right click on my computer – manage – delete the partition whs created.
10) Recreate the partition as a GPT partition if your goal is to use a greater than 2.1TB volume, or realign the partition for advanced sectors if that is your goal. Once you are done creating your partition how you would like, Give it the label “DATA” and mount it back in the old mount point (c:\fs\*) (for example I mounted mine back in as C:\fs\1K) It is critical that you label it correctly and mount it correctly here in this step.
11) Copy your files back into the mount point that you copied out in step 7, copy them in as they were before you deleted the original partition.
OK now we have a good partition created! Now we need to trick WHS into accepting that drive as the old volume that we deleted.
WHS uses MBR volume ids (short) when it creates volumes, if you are using a GPT volume it uses a guid (long), but luckily the registry entries in whs support using long guids as well as the shorter MBR IDs. In this step we are going to make note of the DISK ID so we can trick WHS into using the new volume we created
12) Use the command prompt and type “diskpart”
Type “List Disk” to see all your disks
Choose the disk you would like to view by typing Select Disk X (i.e Select Disk 1)
Type “Detail Disk”
Look for the Disk ID: (for example mine was DISK ID: D67BAD45-F29E4FF49D69-3CE681DBA57B)
WRITE DOWN THAT DISK ID NUMBER! IT IS CRITICAL TO YOUR SUCCESS HERE.
Now that we have recreated the volume on our own terms, we have to tell WHS PP3 how to use it in the registry, many thanks to nitrobass24 on the HARDOCP forums for giving me tips on how this works, they were using these registry values for a different purpose, but his work helped here a lot. For Reference: http://hardforum.com…hp?p=1035306055
11)The first step is to change the disk information values in the registry
Enter the registry (Start – Run – regedit)
Look in your registry under the following path: Computer\HKEY_LOCAL_MACHINE\SOFTWARE\Microsoft\Windows Home Server\Storage Manager\Disks\
Find the registry folder that has a SystemName that matches the original DISKID you found in step 6. (for example mine was 1524393f-5fec-4dda-b108492f1ad342c6 with a SystemName of DB7CA365-0000-0000-0000-000000000000)
OK now you need to modify the SystemName to match the NEW GUID you discovered in Step 12. (for example I changed my system name to D67BAD45-F29E4FF49D69-3CE681DBA57B)
You will also need to change the Size Value to match the volume you created. To find the actual size value, go to the command prompt and type “WMIC”, then type “partition get name, size, startingoffset” make note of these values and enter the correct size value into the registry (mine was 3999688294400)
12) Now we need to change the Volume information values in the registry
Enter the registry (Start – Run – regedit)
Look in your registry under the following path: Computer\HKEY_LOCAL_MACHINE\SOFTWARE\Microsoft\Windows Home Server\Storage Manager\Volumes\
Find the Registry folder that has a MountPoint value that matches yours (for example, I found the folder that had a mount point of C:\fs\1K\)
OK now you need to change the Size to match the volume you created. To find the actual size value, go to the command prompt and type “WMIC”, then type “partition get name, size, startingoffset” make note of these values and enter the correct size value into the registry (mine was 3999688294400)
Now you need to change the SystemName here to match your new volume….. to do this go to the command prompt and type “mountvol” this will give you a list of volume names and current mount points… Find your mount point and make note of the Volume Name (for example mine was \\?\Volume{23e552b6-d0b4-452b-b19c-5071e8c06a76}\) Change the systemname in the registry to match this.
Now, expand the registry of the volume you are currently looking at in regedit. It will expand down to an Attributes folder and another guid folder underneath. In attributes, make sure DevicePath matches the volume name that we just put in in the previous step.
Go to the guid folder next to the attributes folder, we need to set the size and offset here. The name is the offset value, and the Data is the size of the volume, you need to change these to match your setup; so to find the actual size value and offset value, go to the command prompt and type “WMIC”, then type “partition get name, size, startingoffset” make note of these values (for example, my key was named 134235136 and my value was 3999554042368)
OK, you should now be good to go! reboot your server and it should come back up with a fancy GPT partition or properly aligned 4k sector drive ready to be used.
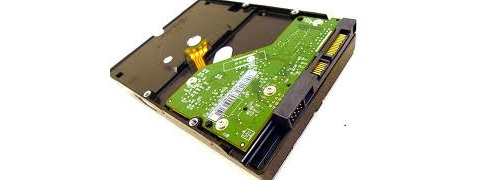
UPDATE: Here is a picture of the drives working as described above: